Don't Break Your Prius! The Hidden Clip Risk When Removing 50 Series Rear Seats
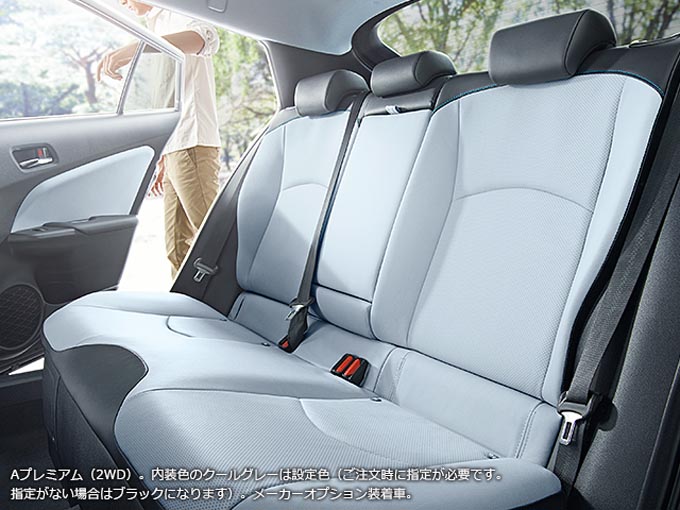
Tearing into the interior of a fourth-generation Toyota Prius seems straightforward until a loud plastic snap echoes through the cabin. As thousands of Gen 4 owners convert their hatchbacks into stealth micro-campers, install tailored leather upholstery, or lay down butyl sound deadening to silence highway tire roar, the rear cabin has become a primary DIY target. Yet beneath the lightweight foam rests an unforgiving assembly of brittle plastic retainers, sensitive supplemental restraint wiring, and vital hybrid battery ventilation pathways.
What should be a ten-minute job routinely spirals into dealership visits for sensor recalibrations and replacement hardware. Understanding how Toyota engineered the floor anchors and safety harnesses on the 50 series chassis separates a seamless upgrade from an expensive weekend disaster.
📌 Key Takeaways:
- The Primary Failure Point: Brute vertical force destroys the factory nylon floor retainers during Gen 4 Prius rear seat cushion removal, making fresh retention clips an essential pre-job purchase.
- Electrical Traps: Disconnecting seat heating wires without isolating the auxiliary electrical system trips persistent instrument cluster warnings that standard OBD-II readers cannot clear.
- Thermal Hazards: Blocking or dislodging the traction pack air intake during work creates long-term battery degradation risks that easily go unnoticed.
Why DIY Mechanics Strip the Gen 4 Prius Cabin
The fourth-generation Prius, produced from the 2016 through 2022 model years, sits on the Toyota New Global Architecture (TNGA-K derivative) GA-C platform. This architecture lowered the center of gravity and tucked the traction battery completely beneath the second-row seating. For long-distance drivers and urban campers, stripping that back row delivers roughly 65 cubic feet of flat, usable cargo space. Acoustic comfort remains another major motivator. The lightweight steel of the rear floor pan acts like a drum, prompting owners to strip the interior to apply dense mass loaded vinyl and closed-cell acoustic foam.
Upholstery wear also drives cabin teardowns. Fitting tailored synthetic leather requires complete perimeter access to slide retaining bands beneath the cushion. Attempting a custom seat cover fitting guide without unbolting the base leads to bunched fabric and wrinkled side bolsters. But the structural integration of the hybrid components directly below that foam means casual tugging creates immediate mechanical fallout.
Cracking the Rear Bench Snap Lock Mechanism Without Damage
The lower cushion does not slide out, nor does it swing on conventional steel hinges. It locks into the sheet metal via two forward-facing anchor loops that drop into white nylon floor brackets. This rear bench snap lock mechanism relies on a friction-fit retention tab. When pulling the cushion straight up by hand, the sheer leverage flexes the plastic collar past its yield point. The hook bends, the bracket fractures, and the lower seat cushion release hook loses all lateral tension.
Experienced Toyota technicians avoid upward yank maneuvers altogether. Releasing the assembly safely requires pushing the lower cushion slightly rearward while sliding a rigid, wide-blade Toyota interior plastic pry tool directly beside the engagement channel. By relieving tension on the retention tongue before lifting, the metal hoop pops free with a distinct, clean snap. If the car has sat through years of sub-freezing winters or desert heat cycles, the nylon becomes glass-brittle. Many shops treat a 50 series Prius seat clip replacement as an assumed service item rather than an optional fix, keeping spare clips (Toyota OEM Part #72693-12080) in stock before even touching the cabin.
Fasteners, Torque Specs, and Component Failure Profiles
Stripping the rear seating structure requires precision handling across multiple mechanical interfaces. Knowing the bolt sizes, torque specifications, and material limits prevents stripped sheet-metal threads and loose brackets later.
| Component & Fastener | Factory Torque / Spec | Primary Failure Mechanism | Replacement Cost |
|---|---|---|---|
| Forward Floor Retainer Clips (2x) | Friction snap-lock | Plastic collar shear from angled lifting | $8, $16 pair |
| Rear Seatback 14mm Hinge Bolts | 35 lb-ft (47 Nm) | Cross-threading into thin floor pan weld-nuts | $6, $12 bolt |
| Seat Heater Sub-Harness Loom | Locking tab quick-disconnect | Wire tear-out caused by lifting cushion while tethered | $85, $160 harness repair |
| Cooling Duct Louver Screws | Plastic expansion rivets | Pin fracture during ham-fisted extraction | $3, $7 pack |
| Cargo Floor Latch Strikers | 18 lb-ft (24 Nm) | Torx/Hex head stripping from overtightening | $15, $25 assembly |
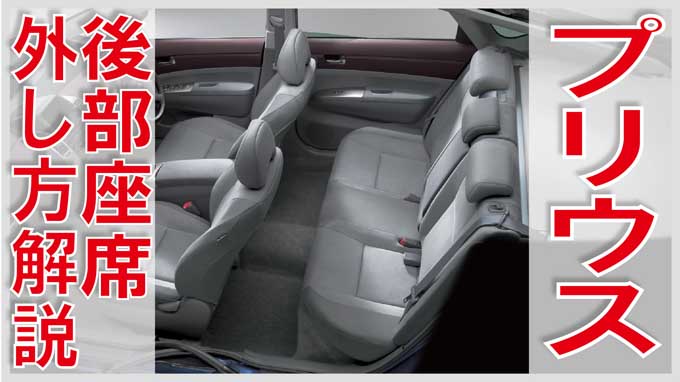
Airbag Sensors and Hybrid Battery Cooling Hazards
Lifting the bench involves far more than mechanical hardware. In upper trim levels such as the Prius Three, Four, and Limited, heated rear cushions demand a delicate seat heater harness disconnect before the cushion moves an inch. Snapping the wires ruins the element continuity. Worse, the wiring bundle routes immediately alongside side-curtain airbag sensor leads and seatbelt tensioner circuits. Turning the ignition to "Ready" mode while these plugs remain detached immediately sets diagnostic trouble code B1650 or associated SRS occupancy faults. These safety codes will not clear through simple battery disconnects; they require bidirectional scan software to reset.
Directly beneath the passenger-side cushion edge sits the hybrid battery cooling intake vent. This slatted duct draws cabin air over the lithium-ion or nickel-metal hydride traction pack. During a teardown, this opening acts like an open funnel. Dropping screws, washers, or acoustic insulation debris down this duct directly fouls the cooling squirrel-cage blower. If blocked during a cargo conversion, the traction battery management system detects thermal throttling within miles, flashing the master warning triangle accompanied by hybrid system failure codes. Any work around this perimeter calls for strict high-voltage battery safety precaution measures: inspect the intake path, seal the vent mouth with low-tack tape while working, and never manipulate the bright orange high-voltage service cables traversing the forward battery enclosure.
Step-by-Step Cushion and Seatback Removal
Executing this job cleanly requires the right sequence. Set aside impact drivers; hand ratchets ensure you retain full control over threads.
Begin by cutting power. Disconnect the negative terminal of the 12V auxiliary battery located in the engine bay or right rear luggage trim depending on your specific 50-series sub-variant. Wait ten minutes for the vehicle's SRS backup capacitors to deplete. Clear all debris from the rear footwells and slide both front seats forward to maximize working clearance.
Locate the front retention hooks. Position yourself outside the rear door, slide your hands beneath the cushion roughly twelve inches inward from the door sill, and feel for the steel wire hoop. Place your wide plastic trim lever right against the receiver clip. Push slightly backward on the cushion foam, then lift upward in one decisive, controlled stroke. Repeat for the opposite side. If your car features heated rear seats, lift the base just two inches, reach underneath with a flat pick, press the locking release tab on the harness connector, and separate it before lifting the cushion completely clear of the rear alignment hooks.
Next, tackle the folding seatbacks. Disengage the folded flat cargo floor latch handles and lower both sections. Unzip the carpet backing clips to expose the steel pivot hinges. You will see three heavy-duty pivot brackets secured by rear seatback 14mm hinge bolts. Break the center bracket bolts loose first, followed by the left and right outboard pivot fasteners. Support the seatback as you extract the final threads so the assembly does not drop and mar the interior quarter plastics. Lift the split backs outward through the hatch opening.
Soundproofing, Custom Covers, and Flat-Floor Builds
With the steel shell exposed, soundproofing floor pan installation can proceed safely. Roll acoustic damping sheets firmly against the bare metal stamping, but leave a clear one-inch boundary around the threaded weld nuts and snap-lock clip housings. Covering these anchor zones prevents the seats from latching back into their original geometry. Never apply sound deadening over the hybrid battery housing access panels or across the intake air ducting.
Those transforming the cabin into a camper bed face an uneven floor once the seatback frames leave the vehicle. A custom-cut 3/8-inch birch plywood platform, supported by routed high-density foam blocks, bridges the drop between the rear hatch lip and the battery tray. Leveling this platform protects the hybrid pack's sheet-metal lid from bearing dead weight. If you are instead finishing an upholstery upgrade, pull seat covers over the detached base indoors, using heavy-duty hog rings or Velcro tensioners. The pristine, wrinkle-free stretch achieved on a workbench simply cannot be matched when wrestling with installed cushions inside a cramped cabin.
Frequently Asked Questions (FAQ)
Q1: Can I legally drive my 50 Prius on public roads with the rear seats removed?
A1: In most jurisdictions, driving without rear passenger seats is legal provided the vehicle is not carrying occupants beyond the available seatbelts. Cargo must remain secured so it cannot shift forward into the driver's seat under hard braking. Check local vehicle code regulations, as commercial conversions occasionally require updated registration classifications.
Q2: My lower seat cushion rattles after reinstalling it. What went wrong?
A2: The nylon floor retainers shattered internally during removal. Even if the steel loops appear locked in place, broken internal catch tabs allow the base to lift and clatter against the metal floor over road undulations. Replacing both forward snap-lock brackets cures the rattle instantly.
Q3: Why is my hybrid cooling fan running loudly after I put everything back together?
A3: You either pinched the intake duct or carpet insulation is restricting airflow around the passenger-side sill vent. When the hybrid computer detects elevated battery temperatures from restricted airflow, it ramps the internal cooling blower to maximum speed. Inspect the duct alignment immediately to avoid traction battery heat damage.
Maintaining Interior Integrity on the 50 Platform
Modifying or stripping a fourth-generation Prius does not have to result in broken clips and illuminated dashboard warnings. Toyota designed the cabin for automated, efficient factory assembly, meaning disassembly demands understanding the mechanical logic behind every fastener. Rushing the process guarantees broken plastic brackets and disrupted electronic circuits. By decoupling the battery, freeing the floor retainers with calibrated lateral leverage, and shielding the hybrid battery vent, you preserve the efficiency, utility, and resale value of your 50 series for hundreds of thousands of miles.


