Step-by-Step Visual Blueprint: Exactly How to Thread and Pull Up the Lower Bobbin Thread

Few mechanical failures derail a sewing project faster than a nested tangle beneath the throat plate. When an otherwise smooth seam suddenly knots into an immovable bird’s nest, frustrated stitchers instinctively blame their needles or motor speeds. Almost every lower thread jam originates from a single misstep during bobbin seating or the loop retrieval sequence. According to trade reporting from a Yahoo!ニュース Report covering technological showcases at the annual Japan Hobby Show at Tokyo Big Sight, modern machine manufacturers like Baby Lock continue to engineer automated pneumatic assists precisely because manual threading remains the industry's most persistent point of user error.
Every domestic sewing machine, from century-old cast-iron workhorses to computerized 2026 units, relies on an interlocking balance between two distinct thread paths. If the bobbin thread skips its channel, the upper hook cannot capture it cleanly. Correcting this sequence takes less than two minutes once you understand the mechanical handoff taking place inside the hook assembly.
📌 Key Takeaways:
- The Essential Motion: Always execute your manual handwheel rotation counterclockwise toward your chest to draw the bobbin thread loop upward without misaligning internal gears.
- Tension Channel Alignment: A loose bobbin inside the needle plate guide slot eliminates drag, immediately destroying the upper thread tension balance and sparking massive nests.
- Mechanical Differences: Top drop-in units mandate a strict counterclockwise "p-shape" drop, whereas oscillating front-loading systems require clicking the metal case latch flush into the sewing machine hook race.
The Mechanics of Bobbin Insertion: Top Drop-In vs. Front-Loading
Before touching the bobbin, raise the needle to its highest position and ensure the presser foot lever position is raised fully. Raising the presser foot opens the upper tension disks, releasing internal line stress. Inspect your machine to identify whether it uses a horizontal top drop-in bobbin system or a vertical front-loading bobbin setup. The threading route differs fundamentally between the two.
Top drop-in systems sit beneath a clear plastic cover directly in front of the needle plate. Hold your wound bobbin between two fingers so the thread unfurls down the left side, resembling the letter "P" rather than a number "9". Drop it flat into the shuttle. Slide the unspooled strand into the front notch, tug it firmly around the curved tension spring clip, and guide it through the integrated needle plate guide slot. Many modern domestic units feature an internal cutting blade at the left terminus. If yours has this cutter, snipping the tail sets your initial length automatically.
Front-loading units require removing the accessory tray to expose a hinged metal door. Pull the bobbin case out by its hinged latch, which locks the inner spool in place during transit. Insert the bobbin into the metal cylinder so the thread unrolls clockwise. Pull the loose strand through the case's narrow diagonal slit until it clicks under the flat tension spring, then leave a 4-inch tail hanging out. Line up the case’s protruding metal finger with the notch at the top of the sewing machine hook race, pushing firmly until an audible snap confirms it has seated.
Executing the Loop Retrieval: How to Pull Up Lower Thread Cleanly
Relying on the machine motor to retrieve your lower thread on the very first stitch is the fastest way to invite a knot. You must pull up lower thread manually before placing fabric under the foot. This physical priming step guarantees that the upper thread hook rotates around the lower shuttle and catches the spool end cleanly.
Hold the upper needle thread taut in your left hand at roughly a 45-degree angle away from the needle eye. With your right hand, complete one full handwheel rotation counterclockwise toward yourself. Never turn the wheel backward away from you; reverse rotation interrupts the synchronized timing of the rotary shuttle and feed dogs. Watch the needle descend completely into the needle plate hole and climb back to its peak apex.
As the take-up lever reaches its highest stop, give the upper thread in your left hand a gentle upward tug. A small loop of bobbin thread will emerge through the needle hole in the throat plate. Slip a closed pair of embroidery scissors, a small ruler, or your fingertip beneath the presser foot to catch this loop, drawing the lower tail fully to the surface. Lay both threads straight out toward the back-left corner of the workspace under the presser foot before lowering your lever onto the fabric.
Diagnosing Tension Flaws and Bobbin Case Drift
Stitching anomalies on the underside of your fabric are frequently misdiagnosed. When you notice severe sewing machine thread bunching, clusters of loose loops on the bottom side of the cloth, the problem almost always lies with the upper thread path rather than the bobbin. If the upper tension discs are not engaged, the machine unspools yards of upper thread unchecked into the shuttle cavity.
True bobbin failures show up differently. If your seam pulls tight and puckers thin fabrics, or if the bobbin thread snaps within the first inch of sewing, your bobbin case tension is excessively tight. Conversely, if lower thread shows on top of the fabric during a standard straight stitch, lower tension is too loose. Front-loading metal cases feature a tiny screw on the exterior leaf spring. Turning this screw clockwise increases tension; turning it counterclockwise decreases it. Adjustments here must be minuscule, no more than a quarter-turn at a time.
| Shuttle Mechanism | Visual Orientation | Primary Tension Guide | Common Operator Error |
|---|---|---|---|
| Horizontal Drop-In | Spool lies flat, thread unwinds counterclockwise ("P" profile) | Needle plate track channel and inner spring clip | Dropping spool clockwise ("9" profile), bypassing tension groove |
| Vertical Front-Loading | Spool sits inside metal case, clicks into central shuttle spindle | External metal leaf spring with micro-adjustment screw | Failing to push metal case until audible locking snap occurs |
| Rotary Industrial / Semi-Pro | Side-loading vertical metal case with deep rotary race | Heavy-gauge flat tension spring calibrated to thread weight | Using generic Class 15 plastic spools instead of precision steel units |
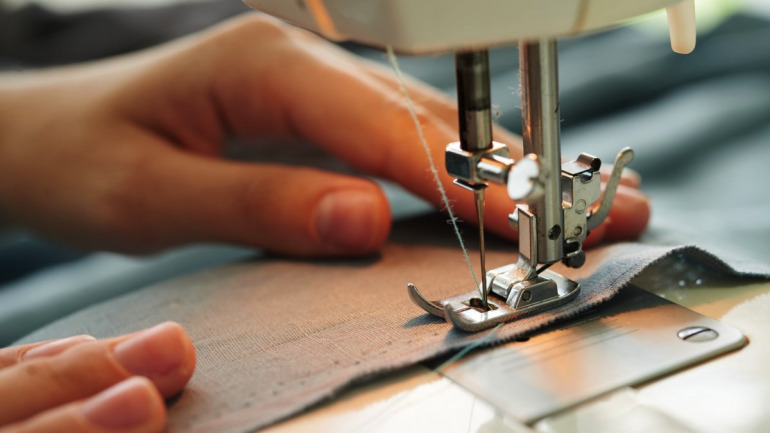
Preventing Jamming and Hook Race Lockups
Thread jams in the shuttle cavity do not simply break threads; they can knock the entire machine out of mechanical synchronization. When thread bundles wedge tightly around the rotary hook, forceful wheel rotations can bend the needle bar or mar the polished metal surface of the race. Practical thread jam prevention starts during winding on the bobbin winding spindle.
Never run a bobbin that was wound unevenly, softly, or manually by hand. Spools wound with irregular tension slacken inside the shuttle, causing the unspooling strand to drop below the rim where it snags on mechanical pinions. When threading the bobbin winding spindle, maintain light tension across the upper pre-tension disc. Wind the core at a steady, medium pedal speed. If the spool wobbles or domes toward the edges, reject it and rewind.
Lint build-up presents another quiet threat to consistent lower tension. Feed dogs and shuttle hooks pull tiny fabric fibers and stray sizing powders deep into the lower compartment on every downward stroke. Over roughly 10 sewing hours, this debris hardens into a dense felt pad directly beneath the bobbin case. Use a stiff nylon brush or miniature vacuum nozzle to clear the hook cavity weekly. Never use moisture-heavy canned air, which drives wet lint deeper into sealed internal gear housings.
Choosing the Proper Bobbin Class for Modern Machines
One of the most persistent misconceptions among beginner hobbyists is that all domestic bobbins are cross-compatible. Inserting a Class 66 curved bobbin into a machine engineered for a flat Class 15 spool alters the thread exit height by less than a millimeter, yet that microscopic gap completely ruins the stitch. The bobbin rattles inside the carriage, skipping loops and scratching the delicate shuttle wall.
Modern machine families are rigid regarding clearance tolerances. High-speed computerized drop-in models require specific polycarbonate bobbins with chamfered edges to clear the internal thread sensors. Heavy-duty mechanical models rely on thicker, flat-sided metal spools capable of withstanding the drag of heavy nylon or bonded polyester threads. Check your machine's manual to verify whether it specifies Class 15, Class 15J, Class 66, or proprietary European dimensions like Bernina’s oversized rotary spools before purchasing aftermarket bulk packs.
Frequently Asked Questions (FAQ)
Q1: Why does my bobbin thread bunch up on the underside of the fabric even after I followed the threading guide?
A1: Bunches on the underside almost always mean the upper thread is not threaded correctly through the machine's take-up lever, or the presser foot was lowered while threading the top line. Rethread the upper path from scratch with the presser foot raised fully to reset tension disks.
Q2: Why won't my upper needle thread pick up the lower bobbin thread when I turn the handwheel?
A2: This usually happens because the needle is inserted backward, the needle is slightly bent, or the upper thread is being held too loosely. Ensure the flat side of the needle shank faces the back of the machine, keep light tension on the top thread, and rotate the handwheel strictly counterclockwise.
Q3: How can I tell if my front-loading bobbin case tension is set correctly without specialized tools?
A3: Perform the "drop test." Place a wound bobbin in the case and suspend it in the air holding only the thread tail. If the case drops freely to the floor, tension is too loose. If you flick your wrist slightly and the case drops an inch or two before stopping, your tension is properly calibrated.
Mastering Machine Mechanics for Cleaner Stitching in 2026
Consistent, professional-grade seams do not depend on high-end electronic gadgets or premium fabric blends. Reliable stitch formation relies on clean mechanical handoffs happening beneath the throat plate. By respecting the orientation of your spool, threading the tension spring decisively, and retrieving your lower tail with a deliberate counterclockwise wheel stroke, you eliminate thread bird-nesting entirely.
Treat lower thread preparation as an exact ritual rather than a casual task. Clean out hook debris after completing garments, match your thread weights to appropriate needle sizes, and verify that your presser foot lever position is raised whenever you rethread the line. These small habits protect your timing gears, preserve precise line tension, and allow your machine to run smoothly on every pass.