The Complete Guide to Stopping Heel Slip: Pro Hacks for Every Shoe
Heel slippage ruins otherwise perfect footwear, turning everyday commutes into painful endurance tests marked by raw friction and ruined socks. While conventional wisdom blames incorrect sizing, biomechanical research indicates that heel instability often signals subtle changes in gait, arch collapse, and mismatched internal shoe proportions. According to foot health specialists cited in an AFPBB News Report, a slipping heel is frequently an indicator of shifting adult foot dynamics rather than just an oversized shoe, demanding targeted mechanical fixes rather than simply sizing down.
📌 Key Takeaways:
- Biomechanical Trigger: Heel slippage stems primarily from heel-to-ball measurement mismatches and narrow calcaneus structure rather than simple shoe length errors.
- Mechanical Corrections: Tongue pads, runner's loop lacing, and silicone friction pads reposition the foot backward more effectively than bulky heel inserts.
- Professional Footwear Alteration: Physical therapists and custom cobblers focus on adjusting heel counter stiffness and arch support to adapt the shoe to the foot rather than forcing the foot to adapt.
Why Shoes Slip Off the Calcaneus
Heel lift occurs when the vertical force of your walking gait overcomes the frictional hold of the shoe's rear interior. When you take a step, your foot naturally bends at the metatarsophalangeal joints, the ball of the foot. If the shoe's sole is stiff or fails to flex at the exact point where your foot breaks, the rigid outsole acts as a lever against your heel, pulling the fabric down while your foot rises.
Standard shoe sizing relies almost exclusively on heel-to-toe length, ignoring the critical heel-to-ball measurement. When this metric is miscalculated, the widest point of the foot sits behind or ahead of the shoe's intended flex groove. The result is mechanical drag. People with narrow heel foot anatomy face an even steeper challenge: mainstream footwear brands build lasts using standardized volume ratios, leaving those with slender calcaneus bones swimming in wide heel cups despite having adequate room across the forefoot.
In footwear like slip-on loafers and ballet flats, the lack of mechanical fasteners amplifies this issue. Without laces or straps to lock the midfoot against the footbed, the entire retention force falls squarely on the heel counter and the vamp. If the instep is too loose, the foot slides forward during the terminal stance phase of gait, vacating the rear shoe cup and causing immediate heel slip.
Targeted Interventions: Ranking Common Heel Slippage Fixes
Addressing slippage requires selecting the correct mechanical intervention based on shoe design and volume disparity. The table below outlines field-tested countermeasures across common footwear categories, evaluating their target placement, retention mechanism, and practical durability.
| Solution Type | Target Shoe Style | Mechanical Action | Typical Lifespan |
|---|---|---|---|
| Tongue Pads | Loafers, oxfords, low-cut boots | Pushes instep down and locks heel rearward | 6, 12 months |
| Runner's Loop Lacing | Running sneakers, trainers, hiking boots | Creates pulley tension over the upper ankle eyelets | Permanent (requires zero hardware) |
| Heel Grip Cushions | Dress pumps, leather flats | Fills negative space behind Achilles tendon | 2, 4 months (adhesive degrades) |
| Orthotic Insole Inserts | Boots, walking shoes, casual sneakers | Elevates arch and stabilizes rearfoot tilt | 12, 24 months |
| Silicone Friction Pads | High heels, backless mules, court shoes | Prevents forward foot slide on steep angles | 3, 6 months |
Why Tongue Pads Outperform Traditional Heel Grips
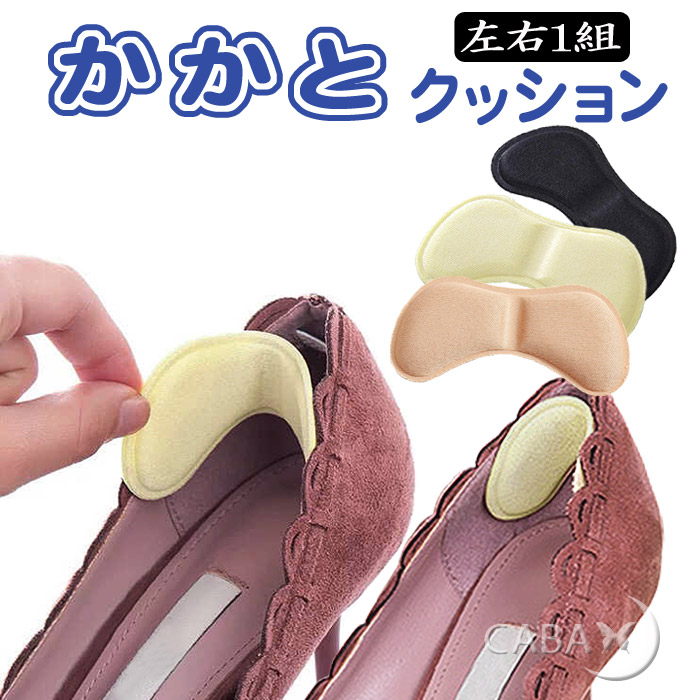
Most shoppers intuitively buy padded heel grips when a shoe slips. Sticking a cushion onto the inside of the heel counter seems logical. In practice, this frequently worsens the problem.
Adding thickness directly behind the heel pushes the entire foot forward into the toe box, cramping the toes while doing very little to anchor the calcaneus. The upward movement of the foot during walking quickly shears the adhesive off the lining, leaving sticky residue and a loosened grip.
Tongue pads solve this geometry problem from the opposite direction. By adhering a felt, foam, or suede pad to the underside of the shoe tongue, or the underside of the vamp in a loafer, you push the instep gently down and back. This secures the heel firmly against the rear of the shoe cup without shortening the functional length of the footbed. Feet stay in place, the toe box remains roomy, and blister prevention improves dramatically.
Mastering Athletic Retention: The Runner's Loop
Sneakers and athletic shoes rarely require adhesive accessories because they feature built-in retention geometry: the secondary top eyelets. Most runners leave these extra upper holes unlaced, missing out on the most reliable zero-cost fix for heel lift.
The runner's loop, frequently called lace lock, transforms the upper collar of the shoe into a cinch harness:
- Thread each lace through the extra top eyelet on the same side, inserting the lace from the outside in to create a small exterior loop on both sides.
- Cross the laces across the tongue and insert each end through the opposing loop.
- Pull the laces outward and down to compress the loops flat against the eyelet row, locking the ankle collar tightly around the joint.
- Tie your standard knot.
This technique anchors the rearfoot into the counter without overtightening the laces across the sensitive metatarsal bones on top of your foot. It prevents micro-movements during steep ascents or high-cadence runs, directly eliminating the friction that causes calcaneal bursitis and heel blisters.
Modifying Loafers and Flats: The Instep Adjustment Strategy
Loafers, ballet flats, and classic slip-on shoes do not have laces to pull tight, making loafer and flat shoe fit notoriously difficult. When a loafer slips, sizing down often leads to crushed toes because the shoe's overall length was correct; only the internal volume was excessive.
To balance slip-ons without sacrificing toe space:
- Add a 3/4 Leather Insole: Placing a thin vegetable-tanned leather insole that stops just behind the ball of the foot lifts the heel and instep, consuming excess vertical space without crowding the toe box.
- Apply Suede Heel Liners: If the heel counter lining is smooth leather or synthetic vinyl, replace the slippery surface with textured suede or silicone friction pads. The nap of the suede catches fabric socks, producing mechanical drag that resists upward heel movement.
- Condition the Outsole: Stiff, thick leather outsoles pull heels downward because they resist natural foot flexion. Flex the sole manually by hand several dozen times, or walk on carpeted surfaces to break the midsole's rigidity before wearing the shoes outside.
The Professional Footwear Alteration Approach
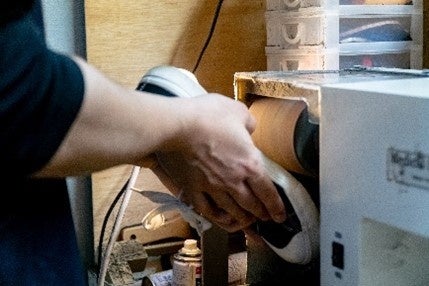
When over-the-counter accessories fail, specialized footwear adjustments can permanently alter the interior dimensions of the shoe. In Sapporo, Japan, physical therapy specialists have pioneered clinical shoe-remodeling programs designed specifically to tackle recurring heel slippage and structural foot pain. Rather than expecting a patient's foot to conform to standardized factory lasts, these practitioners alter the shoe's internal geometry.
Professional modification centers on two primary components: heel counter stiffness and arch platform stability. Cobblers and orthopedic technicians use specialized lasting pliers to compress or heat-mold the internal thermoplastic heel counter, tightening the collar radius to grip narrower heel profiles.
In addition, inserting custom orthotic insole inserts with deep heel cups stabilizes the calcaneus in neutral alignment. When an arch collapses during weight-bearing movement, the heel naturally rotates inward (pronation), which narrows contact with the shoe lining and triggers slippage. Supporting the midfoot structure maintains rearfoot alignment, locking the shoe and foot together naturally through every phase of the stride.
Frequently Asked Questions (FAQ)
Q1: Why does my heel slip even though my toes touch the front of the shoe?
A1: This usually indicates an incorrect heel-to-ball match or excessive internal shoe volume. When a shoe has a low instep or narrow toe box, your foot gets pushed forward before your heel can seat properly against the back counter. Alternatively, a stiff, unbroken outsole may be acting as a lever, pulling the rear of the shoe downward with every step regardless of length.
Q2: Will sizing down half a size fix my slipping loafers?
A2: Rarely. Sizing down shortens the overall length of the footbed, which frequently causes toe pinching without solving heel lift. In most cases, loafers slip because the vamp volume over the instep is too tall. Placing a tongue pad under the vamp or using a 3/4 insole resolves slippage while keeping toe room intact.
Q3: How do I know whether I need a tongue pad or a heel grip?
A3: If your foot slides forward when you walk and your toes bump against the front, you need a tongue pad to hold your instep backward. If your foot stays firmly in place across the arch but the back cup feels cavernous around your Achilles tendon, a heel grip cushion or molded heel counter adjustment is the appropriate solution.
Achieving Long-Term Footwear Stability
Stopping shoe slippage requires recognizing footwear as an interactive mechanical system rather than a static piece of clothing. Lasting comfort depends on controlling internal volume, matching outsole flex points to your natural foot break, and securing the midfoot so the heel settles naturally into its seat.
Take stock of your shoes before buying another pack of disposable sticky grips. Inspect the outsole stiffness, test the hold over your instep with a temporary tongue insert, and lace your running shoes using the top eyelet loop. By addressing how your shoe bends and holds volume, you eliminate friction at the source and keep every pair firmly attached to your stride.