The Complete Yukata Mae-ita Handbook: Sizing, Types, and Troubleshooting
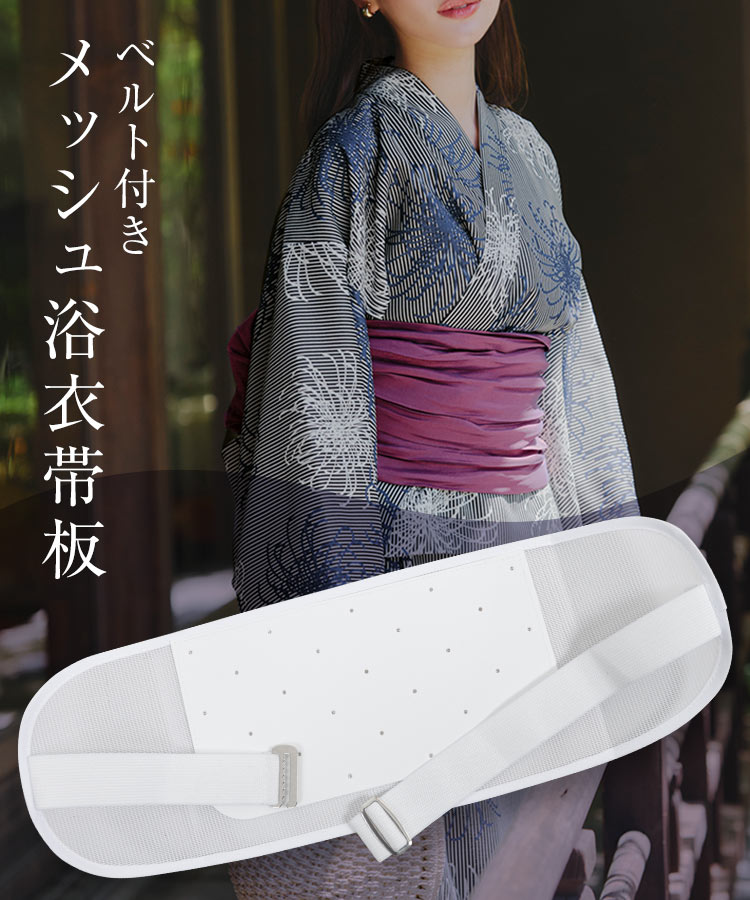
A crisp summer yukata can unravel into a rumpled mess within thirty minutes of walking through a festival crowd. The culprit is rarely the fabric or the knot tied at the back; it is almost always the collapse of the sash across the abdomen. When cotton or poly-blend half-width sashes bend against body movement, they bunch into thick, rope-like folds that pull the entire garment out of alignment.
The solution rests on a thin piece of curved stiffening hardware called the mae-ita (前板). Long considered an essential foundation piece in traditional Japanese kitsuke dressing accessories, this unassuming waist board turns unstable fabric wraps into an architectural, smooth front. Getting the board to sit flush without bruising your ribs or trapping body heat requires understanding how sizing, materials, and wrap sequences interact under high summer temperatures.
📌 Key Takeaways:
- Core Function: The mae-ita prevents the hanhaba obi from crinkling horizontally, maintaining an unbroken torso line while relieving direct sash pressure across the stomach.
- Summer Material Shift: Open-weave mesh mae-ita designs lower torso skin temperatures by up to 3°C to 5°C compared to vinyl or solid acrylic boards.
- Placement Rule: Position the top edge at least two fingers below the sternum to avoid painful rib pinching when sitting down or bending forward.
Why the Mae-Ita Defines the Summer Yukata Silhouette
Yukata fabric is light, unlined, and prone to shifting. When you secure a hanhaba obi, the four-inch-wide casual sash paired with summer wear, the tension pulls fabric directly into the natural hollow between the lower ribcage and the hips. Without an internal stabilizer, every breath, bow, and seated movement creases the sash horizontally.
These horizontal creases do more than distort the visual silhouette. They compress the sash into a tight band that concentrates pressure onto the upper stomach. A properly positioned mae-ita distributes that tension across a broader, flat surface plane. The result is instant yukata posture and waist support that actually makes deep breathing easier during long hours on your feet.
Modern kitsuke instructors frequently debate whether a sash board is mandatory for casual outings. While historical domestic yukata dressing omitted stiffeners for lounging, public festival wear demands clean visual lines. A sash that retains its structure keeps the collar fold locked against the neck and stops the chest overlap from gaping open as you move.
Belted Versus Pocket Mae-Ita: Selecting the Right Construction
Obi boards fall into two practical categories: models with integrated elastic belts and smooth, pocket-style boards designed to slip directly between wraps. Your choice dictates the physical choreography of your dressing sequence.
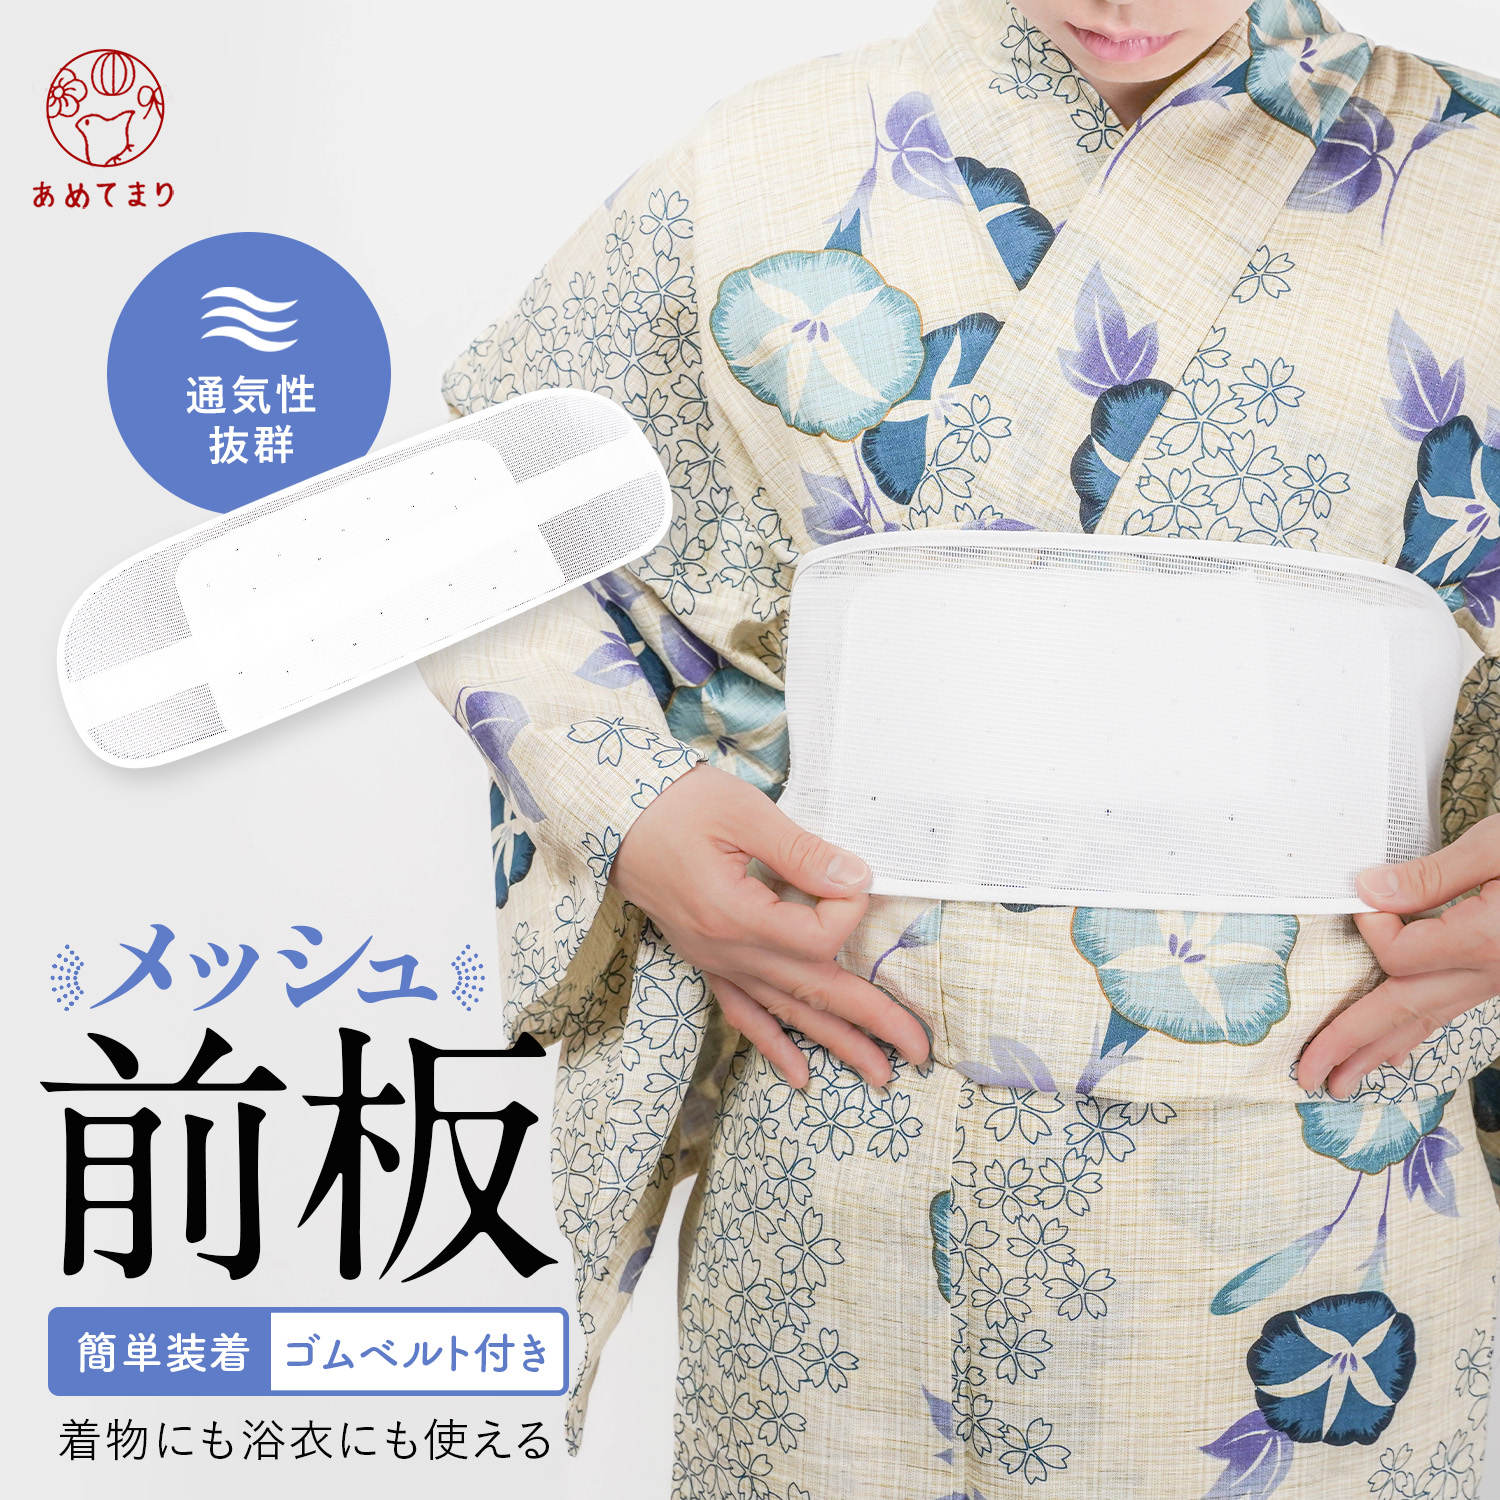
The belted mae-ita features an adjustable elastic band with a metal hook or flat plastic clasp. You fasten this directly over your undergarments or the inner tie before picking up the sash. Because the elastic keeps the board anchored against your body, you can wrap the obi with both hands without worrying about the stiffener sliding out of place. Beginners find this configuration vastly more forgiving.
The pocket or slip-in mae-ita lacks straps entirely. Instead, you wrap the first layer of the sash around your waist, slide the board downward between the first wrap and the second wrap, and then finish tying the knot. Seasoned kimono stylists often favor this method because it introduces zero extra elastic tension around the diaphragm. However, adjusting the board once the sash is half-wound requires hand dexterity that takes practice to master.
For high-heat environments, the mesh mae-ita for summer yukata has superseded traditional vinyl boards. Built from layered nylon or polyester monofilament, these open-weave boards allow sweat vapor to escape rather than pool against the cotton yukata fabric. Many contemporary mesh iterations also include a small built-in pocket designed to hold transit cards, festival cash, or discreet miniature cooling gel packs.
Hardware Benchmarks: Comparing Core Mae-Ita Form Factors
Selecting the wrong board dimensions leads directly to discomfort. Kimono supply retailers carry boards ranging from compact 33-centimeter summer designs up to rigid 49-centimeter formal boards meant for wide fukuro obi. The comparison below outlines the standard options available across specialty kitsuke markets in 2024, 2026.
| Board Type & Material | Standard Dimensions | Best Dressing Scenario | Typical Price Range |
|---|---|---|---|
| Breathable Mesh (Belted)Polyester mesh with rubber elastic | 38 cm, 42 cm length12 cm, 13 cm width | Outdoor summer festivals, active walking, kitsuke novices | ¥1,200, ¥2,400 ($8, $16) |
| Breathable Mesh (Slip-In)Reinforced nylon open weave | 35 cm, 40 cm length11 cm, 12.5 cm width | Lightweight yukata, minimal under-layers, hot climates | ¥800, ¥1,600 ($5, $11) |
| Traditional Lined BoardCellulose core wrapped in acetate | 42 cm, 49 cm length13 cm, 14.5 cm width | Formal summer kimono, ro/sha silks, wide nagoya obi | ¥1,500, ¥3,200 ($10, $22) |
| DIY Placemat AlternativeCut polypropylene sheet | Custom cut (approx. 36 × 12 cm) | Emergency kitsuke setups, travel substitutions | ¥100, ¥450 ($1, $3) |
Step-by-Step Yukata Dressing and Precision Board Placement
Executing clean step-by-step yukata dressing requires coordinating your under-ties before introducing the main sash. Rushing through foundation layers guarantees that the board will tilt during wear.
Begin by securing your koshihimo tie positioning directly above the hip bones. This primary cotton ribbon sets the hemline length and anchors the garment excess (ohashori). Smooth the excess fabric down over the waist, then overlap the front panels flat against your ribs.
Next comes the inner belt fastening technique. If using a wide datejime sash or an elastic majikku belt (magic belt), secure it across your solar plexus to flatten the torso folds. If your mae-ita has an attached elastic belt, it can either replace the datejime or sit directly over it.
Follow these placement steps to prevent the board from migrating:
1. Center the curved board over your navel, ensuring the curve follows the natural arch of your abdomen.
2. Set the vertical elevation: the top edge of the board should sit roughly 3 to 4 centimeters below the lower margin of your ribs.
3. Wrap the attached elastic band around your back horizontally without letting it twist, hooking the fastener with gentle tension. Do not pull it guitar-string tight; it only needs to hold its own weight.
4. Execute your hanhaba obi wrapping guide sequence. Wind the first rotation of the sash firmly over the board. If using a slip-in pocket board instead, complete that first full rotation, slide the board down between the yukata fabric and the inner face of the sash wrap, and then wind the second rotation over the front.
5. Complete your knot, whether a crisp bunko musubi or a relaxed kai-no-kuchi, ensuring the finishing pulls draw tension backward toward the spine rather than pinching the front board.
Solving Pain Points: Rib Pinching, Shifting, and Heat Trapping
The most frequent complaint among festivalgoers is a sharp, stabbing ache under the ribcage when sitting on benches or commuter trains. This is entirely an issue of mae-ita obi board placement geometry, not an unavoidable reality of wearing Japanese attire.
When you sit, your pelvis tilts backward and your thighs push the lower abdomen upward, displacing your clothing by two to three centimeters. If your board was placed high while standing, the top edge gets jammed directly into your floating ribs the moment you sit down. The fix is proactive: push the board down so its bottom edge overlaps the pelvic bones slightly before tying the final knot. When you take a seat, the board slides smoothly over the pelvic shelf instead of gouging your chest.
A shifting or rotating board stems from uneven friction. Slippery polyester yukata undergarments allow the board to drift toward the side seams during long walks. To lock it in place without overtightening ties, choose a board lined with unbleached cotton backing or textured mesh. The friction against the cotton yukata fabric stops horizontal migration instantly.
To succeed at preventing yukata obi wrinkles without overheating, eliminate redundant layers. Many dressers pile on an underwear slip, a waist towel, a datejime tie, a thick vinyl board, and then a heavy double-wrapped sash. That combination creates a localized thermal trap. Swap the towel pad for an ergonomic mesh pad, use a breathable mesh mae-ita, and ensure your obi uses open-weave cotton or hemp fibers. You retain structural stiffness while air flows through the garment weave.
Improvised Solutions: Testing DIY Obi Stiffener Alternatives
If you find yourself preparing for a summer gathering without access to specialty shops, practical DIY obi stiffener alternatives exist in every home or stationery shop. The goal is to replicate the moderate flexibility and rounded profile of commercial kitsuke boards.
A standard plastic desk placemat or heavy polypropylene presentation folder makes the best temporary replacement. Cut the plastic sheet down to a rectangle measuring roughly 12 centimeters wide by 38 centimeters long. Crucially, you must use scissors to round off all four sharp corners into gentle curves. Sharp corners will snag the delicate weave of your yukata from the inside and poke uncomfortably into your waistline.
Avoid corrugated cardboard. Cardboard holds moisture from body sweat, softens within an hour of outdoor humidity, and buckles permanently if you bend at the waist. If you must use paper products, thick Bristol board or double-layered cardstock wrapped cleanly in plastic kitchen wrap offers far superior moisture resistance.
These improvised stiffeners should always be used with the slip-in technique between the first and second wraps of your sash. Applying direct elastic cords to homemade plastic sheets creates uneven stress points that can warp the plastic into painful ridges.
Frequently Asked Questions (FAQ)
Q1: Can I wear a casual yukata without a mae-ita at all?
A1: Yes, especially in private or relaxed indoor settings. However, for outdoor festivals, dining, or events where you want clean photographs, skipping the board causes the sash to collapse into rope-like creases within an hour. A lightweight mesh board preserves the garment profile without adding bulk.
Q2: Should the mae-ita sit directly against the skin or undergarments?
A2: Never place the board against bare skin. It should sit over your base layer (hadajuban or cotton under-camisole) and outside the folded yukata panels, directly under or between the layers of the obi sash. Placing it next to bare skin causes chafing and blocks sweat absorption.
Q3: What should I do if my mae-ita is longer than my waist width?
A3: Standard formal kimono boards (45, 49 cm) are too long for casual yukata and wrap past the hip bones into the back, making the obi sit awkwardly. For yukata dressing, choose a compact board between 35 cm and 40 cm so the stiffener stays cleanly positioned across the front abdomen without curling around your sides.
Elevating Your Summer Kitsuke in 2026
Traditional garments endure because their underlying mechanics solve practical human challenges. The mae-ita is not an arbitrary rule enforced by kitsuke purists; it is functional engineering designed to make an unstructured length of woven fabric behave predictably on a moving human body.
By pairing a breathable mesh board with correct pelvic placement, you eliminate rib pain and heat exhaustion before they start. You can navigate crowded night markets, sit comfortably through seasonal dinners, and enjoy summer festivities knowing your yukata looks as crisp at midnight as it did when you stepped out the door.