Complete Beginner's Guide to Sculpt Nails: Process, Cost, and Care
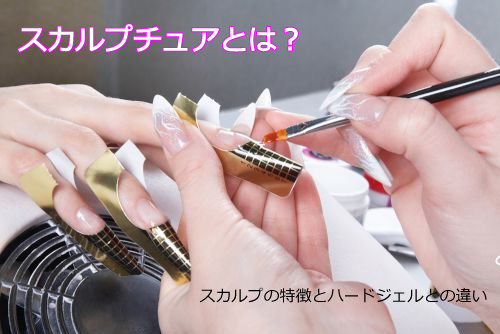
Custom nail enhancements have shifted far beyond mass-produced plastic glue-ons. Known across East Asia and trend-setting salons as sculp nail (スカルプネイル), the technique builds artificial length and structural arches directly over the natural nail plate without relying on pre-formed plastic tips. Early trend monitors, including an EDM MAXX Report tracking minimalist festival aesthetics, documented how bespoke nail enhancements became staples of everyday personal styling. Modern beauty operators are capitalizing heavily on that momentum. In Tokyo, salon operator Link up Inc., led by CEO Toshio Nakazawa, posted 133% year-over-year growth while expanding its Tachikawa flagship to a 14-seat facility dedicated to pairing advanced length extension techniques with lash services for young urban professionals.
The appeal lies in structural customization. By tailoring the shape to each finger, technicians correct uneven natural growth and create a balanced arch. Understanding the chemistry, salon costs, and maintenance protocols makes all the difference in keeping natural nails healthy underneath.
📌 Key Takeaways:
- Core Definition: Sculpted nails extend length using liquid monomer and acrylic powder (or high-viscosity builder gel) formed over adhesive foil templates rather than glued plastic tips.
- Structural Advantage: Custom tip shaping and tailored apex placement distribute mechanical stress evenly, achieving superior durability and creating visual nail bed elongation.
- Financial & Time Commitment: Full sets cost between **$80 and $160**, requiring professional salon infill maintenance every **2 to 3 weeks** to prevent structural lift and natural nail plate trauma.
How Sculpted Nails Work: Chemistry and Nail Form Application
The term "sculp" is shorthand for sculpted extensions. Unlike tip overlays, which glue pre-molded ABS plastic to the nail tip before adding an acrylic wash, a sculpted nail builds the entire extension from scratch.
The technician fits a disposable metallic or paper nail form snug under the natural free edge. This form acts as temporary scaffolding. The technician then dips a sable brush into liquid monomer, primarily ethyl methacrylate (EMA), and drags it through polymer powder. This chemical reaction creates a pliable bead of acrylic.
+-------------------------------------------------------------+
+-------------------------------------------------------------+
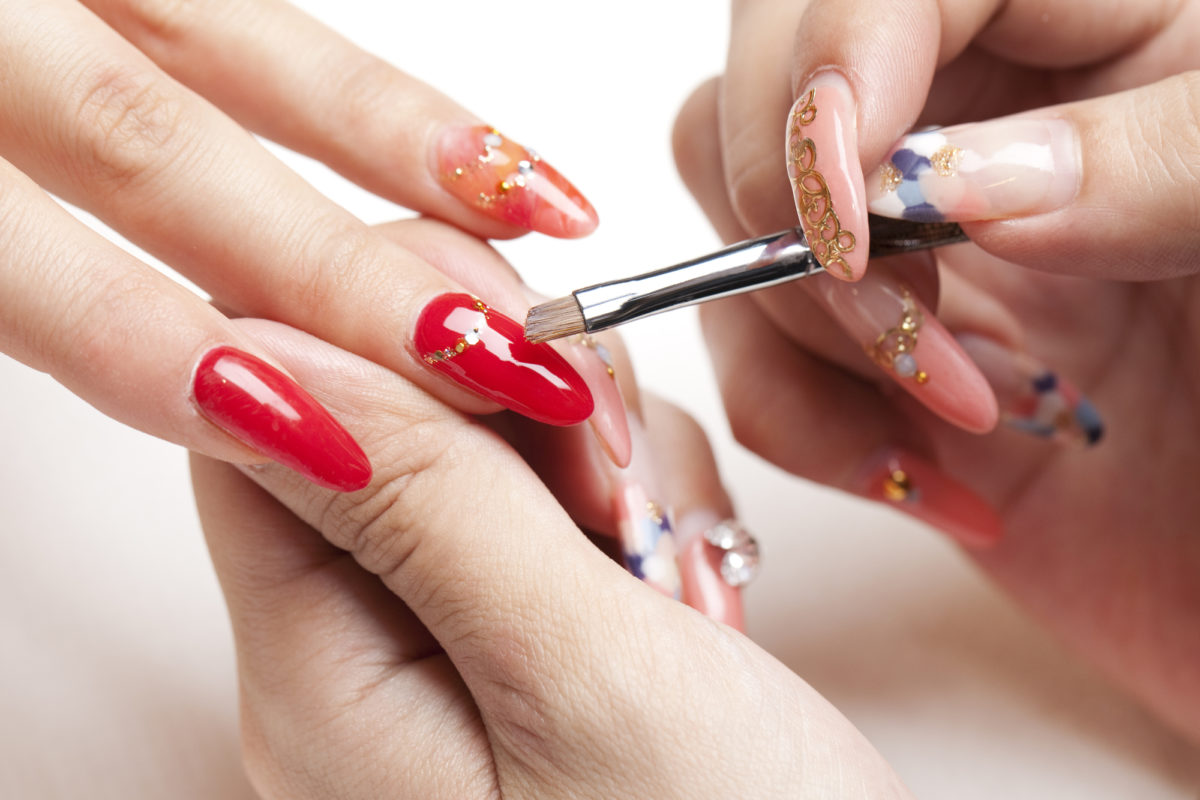
Technicians press and manipulate this bead across the natural nail plate, sliding outward onto the form. They sculpt the length, c-curve, and sidewalls in real time. Because the material cures into an unbroken cross-linked matrix, the extension fits flush against the natural nail anatomy.
This tailor-made fit eliminates glue gaps. In turn, it dramatically lowers the risk of trapped moisture and bacterial infections like Pseudomonas aeruginosa, commonly called "greenies."
Acrylic Sculpt vs. Hard Gel Sculpt: Durability and Mechanics
Clients generally choose between two primary mediums: liquid monomer and powder acrylics, or high-viscosity hard gels cured under UV/LED light. Both techniques create strong length extensions, but they flex and wear differently under stress.
Acrylic remains the legacy standard for maximum tensile hardness. It air-dries into a rigid shell, making it ideal for extreme lengths, sharp stilettos, and deep-curved coffin profiles. Hard gel offers higher molecular elasticity. It bends slightly under impact rather than cracking, making it a favorite for clients with thin, brittle nail beds.
| Performance Metric | Liquid & Powder Acrylic Sculpt | Hard Builder Gel Sculpt | Standard Plastic Glue-On Tips |
|---|---|---|---|
| Base Application Method | Custom nail form + EMA monomer | Custom nail form + oligomer gel | Cyanoacrylate glue + plastic tip |
| Average Lifespan Before Infill | 2, 3 weeks | 3, 4 weeks | 1, 2 weeks |
| Flexibility & Shock Absorption | Low (Rigid & dense) | Moderate to high (Elastic) | Low (Prone to popping off) |
| Removal Chemistry | 100% Pure acetone soak | E-file debulking (Non-soakable) | Acetone dissolve |
| Typical Salon Cost (US Metro) | $85, $140 | $95, $160 | $55, $80 |
Gel cures odorless without the sharp vapor cloud of monomer acrylics. However, true hard gel cannot be dissolved in acetone. Removing it requires a steady hand with an electric file (e-file) to thin the product safely above the natural nail plate.
The Complete Salon Application Protocol Step-by-Step
A durable sculpted manicure relies heavily on meticulous prep work. Skipping proper chemical dehydration or misplacing the structural apex almost guarantees lifting within days.
+-----------------------------------------------------------------+
+-----------------------------------------------------------------+
1. Cuticle Prep and Dehydration
Technicians clear the non-living eponychium tissue from the nail plate using a diamond flame bit on low RPM. Next, they lightly buff the surface with a 180-grit buffer to strip away natural oils and shine. They swab the surface with a dehydrating solution of pure isopropyl alcohol and acetone before applying an acid-free primer. This layer binds to natural keratin fibers on one end and cross-links with the acrylic polymers on the other.
2. Form Placement and Alignment
The technician fits an adhesive foil guide under the free edge of each finger, aligning it with the natural bone line of the finger. Improper form placement ruins the set. Tilt the form too high, and the finished nail pulls upward, snagging on hair and clothes. Angle it too low, and the tip angles down into an uneven, claw-like shape.
3. Apex Creation and Bead Control
Using a wet monomer bead, the technician sculpts the extension's length and sidewalls across the form. A second, thicker bead reinforces the apex, the highest, thickest point of the artificial structure. This apex must sit right over the natural stress point where the nail plate meets the free edge. When you accidentally tap a hard surface, this reinforced zone absorbs the blow, preventing painful tears across the nail bed.
4. C-Curve Pinching and Contour Filing
As the acrylic hits its semi-cured, rubbery stage, the technician pinches the lateral sidewalls using metal clamps or thumb pressure. This step shapes a narrow, structurally sound C-curve arc across the barrel of the nail.
Once the acrylic fully cures with a distinct clicking sound, the technician peels off the forms. Armed with an e-file and hand files, they shape the perimeter into crisp squares, almonds, or coffins before polishing the surface smooth and applying a gel topcoat.
Salon Pricing Dynamics and Infill Schedules
A full sculpted set takes technical mastery and 90 to 150 minutes of focused salon work. That labor drives up the price compared to basic manicures. Full sets run between $85 and $160 in major metropolitan markets, with complex nail art adding another $20 to $60.
INITIAL FULL SET ($85 - $160)
│
├── [Day 14-21] First Infill ($50 - $85)
│ └── Cleans new growth gap, rebalances shifted apex
│
├── [Day 28-42] Second Infill ($50 - $85)
│ └── Redresses wear, checks sidewall stability
│
└── [Week 8-10] Complete Removal & Reset ($30 - $45)
└── Acetone soak-off, natural plate inspection
Infill sessions are mandatory, not optional upgrades. Natural nails grow out roughly 3 millimeters every month. As the nail grows, that structural apex travels outward toward the free edge.
Leaving an enhancement on past three weeks shifts the balance of the nail outward. At that point, minor daily bumps put leverage directly on the unsupported natural nail bed, risking painful vertical breaks.
Salons charge $50 to $85 for infill appointments. Technicians grind away any lifted edges near the cuticle, reapply primer to new growth, lay down fresh acrylic, and rebalance the apex over the stress area.
Safe Acetone Removal and Natural Nail Preservation
The old salon myth that sculpted nails "ruin" the nail bed comes from poor removal habits, not the product itself. The damage happens when clients pry, bite, or pop off lifting acrylics. Ripping off an enhancement tears away the superficial dorsal layers of keratin, leaving behind red, sensitive, thinned nails.
Safe removal takes patience and pure acetone:
- Debulk the Structure: Using a coarse carbide e-file bit or a 100-grit hand file, file down roughly 70% of the acrylic's thickness. Remove the topcoat entirely so the acetone can penetrate the polymer matrix.
- Soak the Nails: Soak cotton pads in 100% pure technical-grade acetone, place them over each nail, and wrap the fingertips in aluminum foil. Avoid warming acetone over open flames or directly in microwaves; instead, place the acetone bowl over a secondary bowl of hot tap water to speed up the dissolution rate safely.
- Gently Clear the Residue: After 15 to 20 minutes, open the foils. The acrylic will look soft, gummy, and textured. Scrape away the dissolved material using an orangewood stick or round-edged cuticle pusher.
- Repeat Instead of Scraping: If a stubborn base layer remains, rewrap the nail for another 5 to 10 minutes. Never scrape hard against the natural nail plate.
- Rehydrate: Acetone strips away natural lipids. Massage cold-pressed jojoba oil and vitamin E into the eponychium folds and surrounding skin to restore moisture.
Frequently Asked Questions (FAQ)
Q1: Can people with short or bitten nails get sculpted nails?
A: Yes. Technicians fit custom forms beneath severely short or bitten edges, adjusting the template to protect damaged skin. Sculpted overlays also shield raw nail beds from further biting, giving the natural nail room to grow out undisturbed underneath.
Q2: How do sculpts differ from standard soft-gel tip systems like Gel-X?
A: Gel-X systems use premade, full-cover clear tips glued over the nail with soft gel base coats. They provide consistent factory-molded shapes quickly, but they lack custom flexibility. Sculpting builds the entire nail from liquid and powder over forms, letting technicians adjust the apex height, width, and c-curve for uneven or flat nail plates.
Q3: Will wearing sculpted extensions trigger monomer allergies?
A: Allergic contact dermatitis is usually caused by unreacted monomers touching the surrounding skin. Professional technicians use high-grade ethyl methacrylate (EMA) formulas and keep the wet product off the eponychium and sidewalls. Steer clear of cheap salons that cut corners with methyl methacrylate (MMA), a banned, overly rigid bonding agent that causes severe allergic reactions and nail plate trauma.
Maintaining Structural Integrity and Nail Health
Longevity comes down to how you treat your nails after leaving the salon. Think of sculpted enhancements as delicate jewelry, not multi-tools. Opening soda cans, peeling labels, and typing with your finger pads instead of your nails will quickly stress the structural apex and crack the sidewalls.
Protect the enhancements from harsh cleaning solvents. Prolonged exposure to bleach and cleaning products degrades the cross-linked polymers, turning the material brittle and yellow. Wear rubber gloves when doing household chores to protect the seal around your cuticles.
Keep the enhancements hydrated. Apply jojoba-based cuticle oil twice a day to the nail folds and under the free edge. Jojoba oil penetrates the acrylic matrix and natural keratin, keeping the artificial enhancement resilient against daily impacts while keeping your natural nails flexible underneath.